Showing posts with label plants. Show all posts

Tuesday, October 2, 2012

The 365 Project: Week 39

This week on Picaboo, the theme was all about Fall.  I know I recently posted a week of fall already in lieu of a theme I didn't want to do.  But you can never have enough pictures of fall!  I do wish they would have waited another week or two however since peak season hasn't quite hit here yet, only some trees were beginning to turn when I started week 39.  My photo above made it into Picaboo's blog of the best of the week!

From last year
One of the problems with taking photos in the fall is that haze you may have seen when taking landscape photos.  It makes the colors appear dull or even blue-ish in your photos.  You can avoid this by using a polarizing filter on your lens or taking your photos in the morning or after a rainfall when the air is clear.

Taken in the late evening, see how warm the color is?

Taking photos during the golden hour will really show off those vibrant hues!  The golden hour is the hour after sunrise and the hour before sunset when the light is "golden" and shows off the best color.Also make sure your white balance isn't on auto.  Your white balance is the sunny, cloudy, fluorescent, etc settings.  Cloudy will give you a warmer photo and enhance those colors!  That's my go to setting on my own camera.

I underexposed this a touch to deepen the red of the leaf
Underexposing your photos can help you capture truer colors and make them richer.  This is the +/- button on your camera.  Dial it down a tick or two to underexpose just a touch without making it look overly dark.  You can enhance the contrast and brightness after uploading onto the computer. 

Nice contrast of red with a touch of green
More contrast

Look for contrast.  Things like a yellow tree against a bright blue sky or a person wearing red against green grass really make a photo pop.

Yay macro!

And my favorite, macro!  This is the little tulip or flower button on your point and shoot, or use a macro lens if you have on for your dSLR.  This is a great time to get those up close detailed pictures of leaves and fading flowers!

Friday, September 28, 2012

Found it on Pinterest and Actually Did it: Mason Jar Terraruim

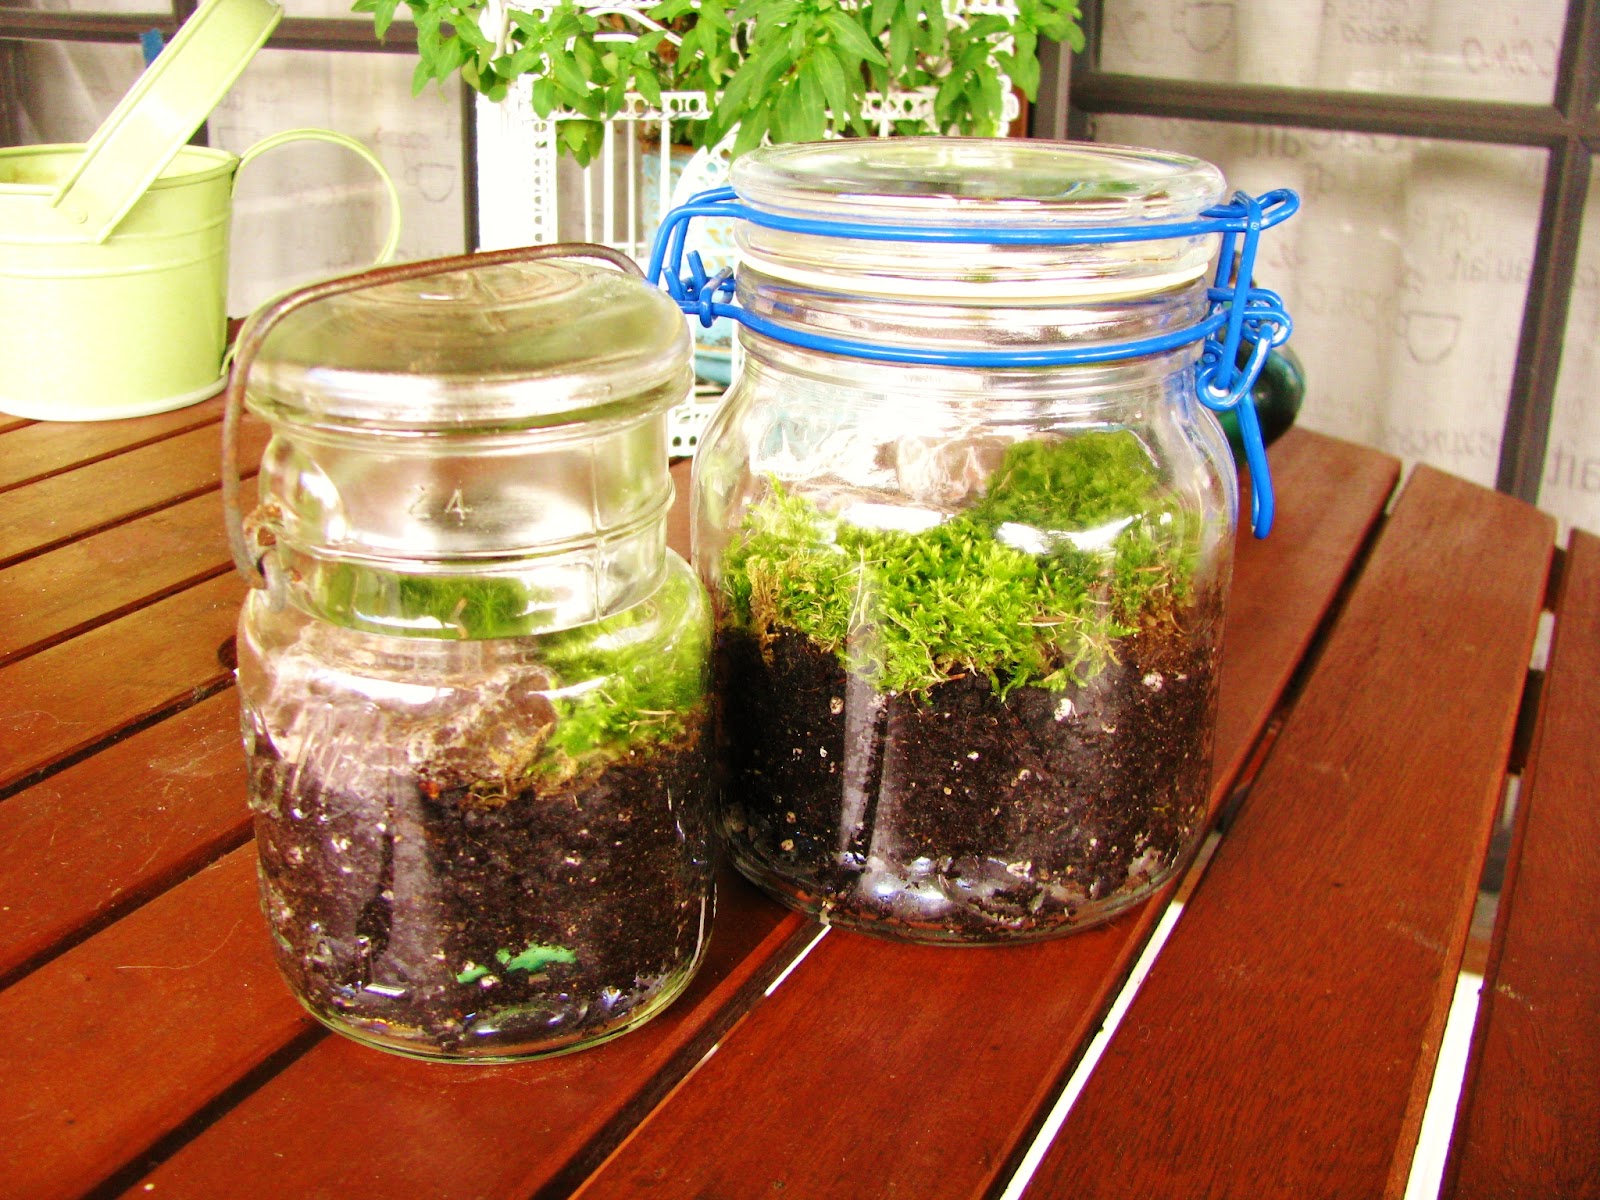
I used two jars I already had on hand and moss from the yard
I'm sure many of you are Pinterest fanatics just like me.  Or perhaps my obsession is just plain unhealthy.... nah.  Anyway, my absolute favoritest (yeah it's not a word, what of it) thing on earth is easy to handle DIY projects that don't require me to take a class in carpentry or whatever to do.  I've been doing this since I was a kid and now thanks to Pinterest, these fun crafts are only a pin away :)

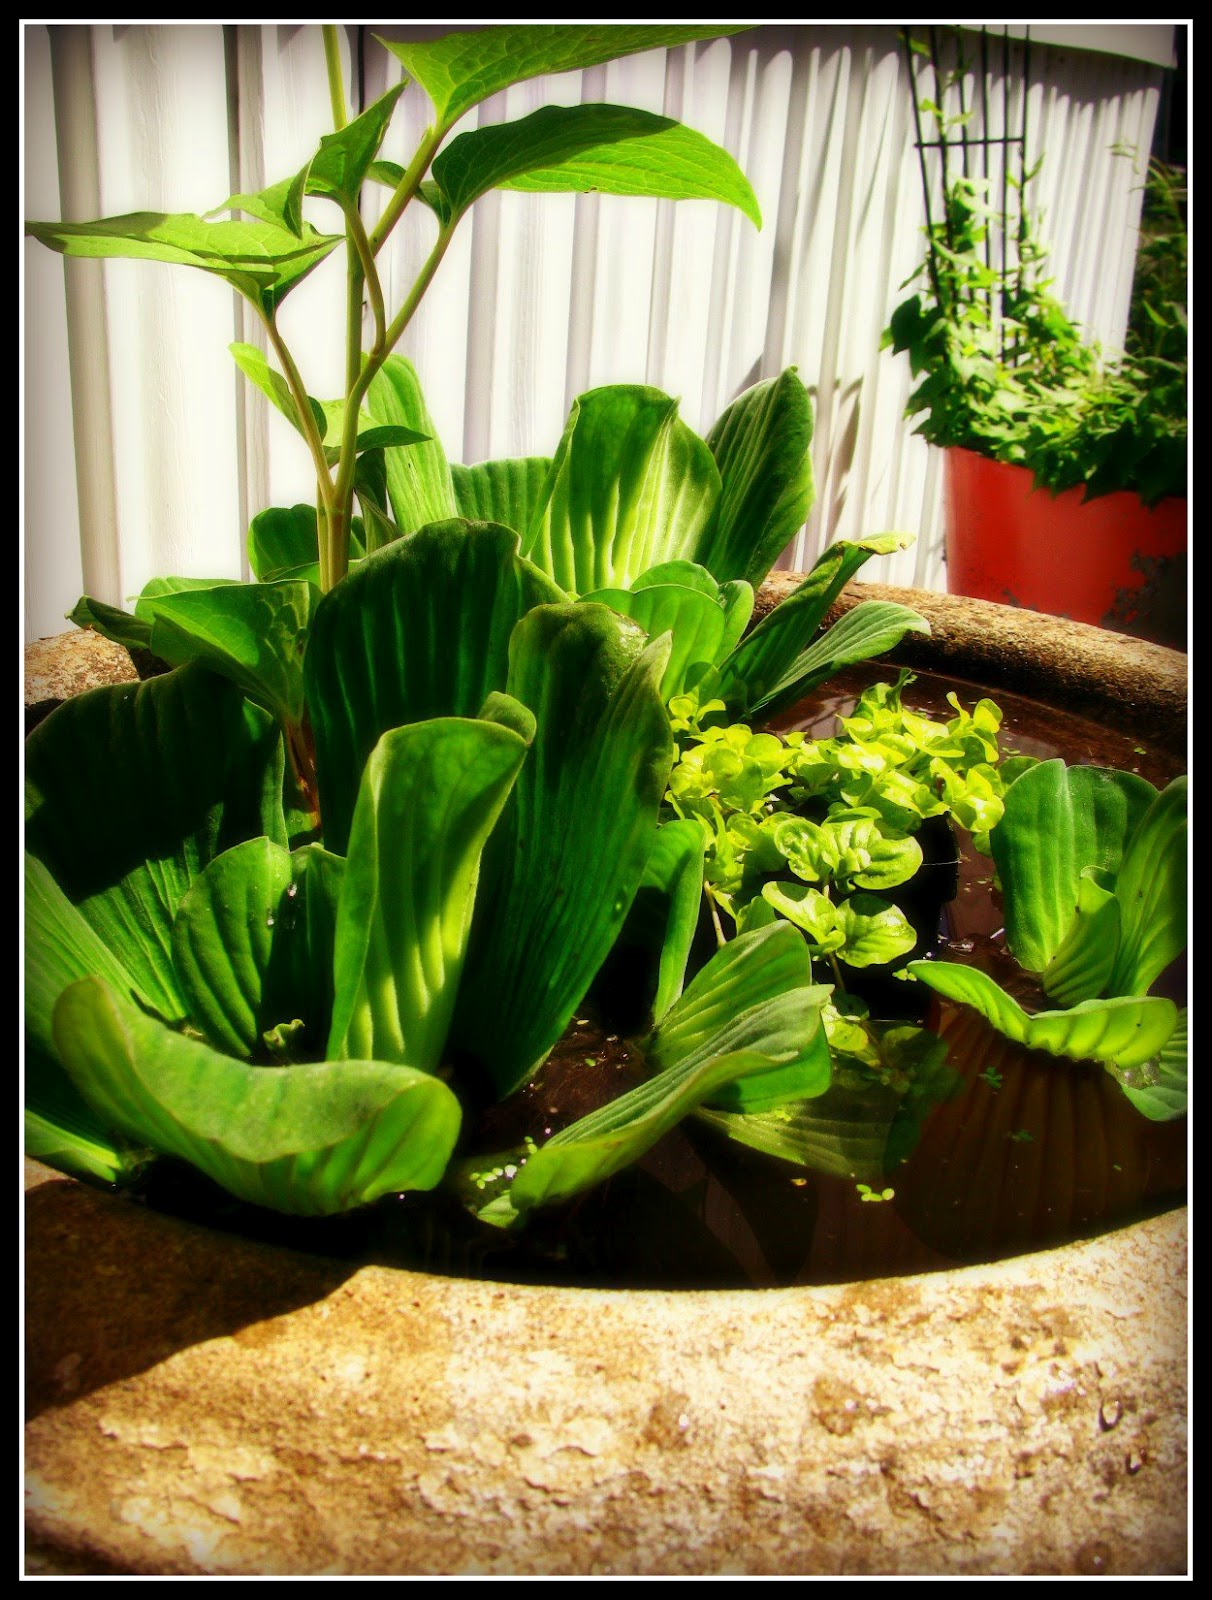
We found two different kinds of moss, maybe three?

Today, my daughter and I decided on making a pair of cute closed jar terrarium using two of the million antique glass jars I possess (another one of my obsessions, I mean hobbies).  I followed the directions in the tutorial and we went exploring for moss in the yard which grows somewhat plentiful where I am.  We found two kinds, don't ask me what kind they are.  Kaylie calls it a "fuzzy growing carpet", close enough for me.  I let her pick out some decorative glass stones I had on hand to cover the bottom of the jars for drainage and then scoop a few inches of dirt over it.  We divided the fuzzy growing carpets to fit in the jars and filled in the bare spots with pretty rocks which were from my planters inside to keep the cat from digging up my plant.  I asked if she wanted to put one of her little plastic jungle animals inside for decoration but she was really concerned that they would be scared about being trapped inside.  Four year olds are too cute!

It sorta does look like fuzzy carpet

According to the tutorial online, if you keep the jars closed, the plants inside will recycle their own water as it evaporates and then drips back to the soil.  I personally would recommend opening the jar from time to time to replenish it with fresh air.

Kaylie had a blast helping me make this!  If you have little ones, you may want to try it out too!  Here's my pin if you'd like to repin it for yourself!  Or you can pin this post by clicking the pin it button to the right!

Wednesday, August 29, 2012

The 365 Project: Week 34

Lake superior agates in the water

This week on Picaboo was all about photographing water.  Considering I live right along Lake Michigan's Little Bay de Noc, I'm pretty familiar with photographing the stuff.

Lake Stella in the early evening

The rising sun and thick morning mist made for a dramatic effect

There are of course  a few tips and tricks to keep in mind in order to get great shots of water however.  Many of my water photos are either along the beach or of waterfalls, which are my favorite.  In a general sense, consider your time of day.  The best times for taking gorgeous photos of water is morning and late afternoon though evening.  Cloudy or partly cloudy days are best for reflections and reduces glare off the water, giving you better color representation along with a better photo all around.  Of course if you're taking photos of a shaded water fall or creek for example then a sunny day may give you the best ambient lighting and give you a cool light filtering through the trees look.

Reflections of reeds in the early morning

Wagner Falls near Munising Mi

For capturing waterfalls there are a few ways to go about it.  You can set your camera to landscape and just point a shoot for a general photo or you can freeze the water or speed it up to give that silky water look.  To freeze water you can set your camera to the action setting or if you have a dSLR use a fast shutter speed such as 1/5000th of a second.  You may want to use a tripod to reduce camera shake.  This is also how you can capture those neat shots of dripping water or frozen in time fountains and sprinklers.

Water rushing over the rocks

To give the water a silky appearance as I have, you have to slow your shutter speed down.  Something close to a second should do the trick but play with the speeds till you get a shot you like.  If you don't have a dSLR you can try and use the night or firework setting but be sure to change your light meter (the +/- button) high on the + side to get more light in your picture. 

Water droplet on a coleus leaf


Tuesday, July 17, 2012

The 365 Project: Week 28

Fresh cherry tomatoes and sugar peas from my garden
This week's theme/challenge was about focus.  I love the macro (close up, the little tulip button) setting on my camera so focus is something that is extremely important for me when taking photos.

A little fawn resting in the shade in my backyard

My fluffy Coon, Jasper.  I focused on the light to help darken the image.

Now if you have a fancy dSLR camera, there's lots of different focusing techniques for you to use depending on the circumstances.  I don't have one so I skipped that half of the tutorial.  If you'd like to read it, check out the tutorial on Picaboo.  For the rest of us with point and shoots, focusing is still very important and can be tricky.

Beautiful Red Admiral butterfly on a plant stand on my porch

Freshly watered impatiens

Most cameras focus automatically but you can fake your point and shoot to focus on what you want, not just the center of your screen.  Press your shutter button halfway and you'll probably hear a beep.  Depending on what type of make/model of your camera, a little box should show up on your LCD screen showing you what it's focusing on. You can trick your camera into darkening or brightening your shot.  Want it brighter? Focus on a darker area of your subject and press halfway on your shutter button then move your camera back to your subject.  Want it darker?  Focus on a lighter area of your subject and press halfway.  So long as you're not changing the distance from your subject it should remain a crisp image!

I never knew hens and chicks flowered!  Tiny but gorgeous!
Blueberries ready for picking!  I focused on a darker area to brighten it up.

If you routinely have trouble with unclear images you can try lowering your megapixels (check out your manual on how to do it).  You only need about 5 or 6 megapixels to print a good 4x6 photo.  Sometimes too many megapixels causes noise in the background.  Some brands of point and shoots don't have good sensors for achieving clarity.  I have only owned Canon brand cameras in the more advanced end of the PowerShot series and I personally have never had this issue, but it may be worth a try if you have trouble getting a clear photo!


Thursday, July 5, 2012

The 365 Project: Week 26

Yellow Daylily
Back in April Picaboo had a theme of photographing flowers and I was so sad since in April, we have no flowers in my neck of the woods way up north.  Not even a tulip!  So for this week I'll be revisiting that theme now that they are in full swing in my garden as you saw in my earlier garden tour post!

Lavender about to bloom in the evening sunlight

Viola growing wild in my vine planter

Quite a bit goes into photographing flowers when you really get down to it.  If you want your photos to look great you have to think ahead before clicking away.  pay attention to things like the rule of thirds, leading lines, perspective, lighting, and watch your cropping.  You also want to double check your background to make sure nothing distracting will be in your photo.

Daisies reaching for the sky

A pretty little flower on one of my vines

My favorite part of photographing photos is macro (close up)!  I love, love, love it!  If your camera has this feature (it's usually the little tulip or flower button) or if you have a macro lens for your dSLR then break it out and go nuts!  However, with using macro the most important thing to remember is focus.  Make sure your camera is focusing on the middle of the subject or whatever it is you want to be crisp.  For flowers, I try to focus on the stamen and pistil (the pollen covered parts in the center) to keep my photos super crisp when I'm all up in that flower's business.

Daisies

Hot pink petunia!

For post processing, check your photos for proper focus and if you've taken good photos all you should need to do is minor highlight, contrast, and perhaps a bit of color enhancements to make them really pop.

Thursday, June 28, 2012

The 365 Project: Week 25

Water droplets on a leaf
For this week on Picaboo, the theme was converting your photos into black and white.  The photo above made into their weekly blog post of the best of the week!

Kaylie playing in the driveway

Sailboat on the bay

Black and white photos are one of my favorite.  They add a sense of drama with the stark contrast and added details.  Not that there's anything wrong with color, it's just more interesting without sometimes!
Trail to the beach

Not everything looks better in black and white though.  I find the best subjects for black and white are people, pets/animals, and dramatic landscapes (you know, like those awesome black and white mountain scenes), and urban landscapes (brick looks freaking awesome in black and white).

Fresh picked blueberries from my garden
Now I know you can probably take photos already in black and white with most digital cameras and I use the feature too but they tend to turn out more of a muddy grey and need more post processing.  If you are more comfortable with using this then go ahead.  I prefer to take photos in color and then change them to black and white.  This allows me to keep ones in color that I don't particularly like in black in white and also like I mentioned, it saves on some post processing if I do convert them.  For this week's photos I converted some of them using Picmonkey, a free online photo editing site, and some using Windows Live Photo Gallery, about the most basic yet very helpful photo editing tool for us not-so-Photoshop-savvy people.

Lavender in bloom
A vine in my planter called Silver Falls

Once you've uploaded your photos and converted to black and white, you're going to need to do some tweaking.  If you don't then you are really amazing!  All you need to do is play with the basic photo tools: highlight, shadows and most importantly, contrast.  Just play with it till the details begin to really pop!

Tuesday, June 12, 2012

Take A Tour of My Garden

A pretty Monarch visiting my lilacs, taken on Instagram
As you may already know, I love flowers and naturally I love gardening.  Well, I should say I like the end result of gardening; if I could skip the getting covered in dirt from head to toe while burning my skin to freshly boiled lobster crisp part, that would be dandy!  That being said, I wanted to share with you some pictures I've taken now that the flowers and plants are really taking off!  I excluded photos of my tulips since I'm sure you've seen enough of them in past 365 Project posts!

One of my hens and chicks early in spring
Dragon's Blood Sedum covering up an old ugly stump
Just got my water garden all set up with two goldfish too!
A flower garden staple: petunias!


The pretties in my flower ring minus the lavender, which hasn't bloomed yet.

You cannot beat the smell of lilacs!  I'm glad I invested in re-blooming plants!

A busy visitor

Pink thrift

Getting all artsy, I love the sun flair!  Pink thrift from an ant's perspective
One of my favorite garden flowers: Daisies in all sorts and colors!

Arizona Sun.  This one just opened today

Gerbera Daisy

Classic daisy rescued from my yard
Pretty orange daisy with a wisp of violet
Dianthus is another favorite

Purple dianthus with morning dew

This shot turned out great!  Just watered them

A mix of dainty pink and white dianthus
Now for a few others around the garden!

Blood red snapdragons

I can't remember the name of these but it's a flowering vine

More sun flair!  Impatiens in a hanging basket

Peach impatiens

Purple lupine, these puppies are taking over now!

Soft peach and white geranium

midnight blue torneia, the hummingbirds are crazy for these!
Well I hope you enjoyed a little virtual stroll through my garden!  As summer progresses and new flowers bloom, I'll be posting more pictures!